How to Fix Roborock e4 Blocked Filter Notification
Published 2023-05-24
The blocked filter notification is (from my experience) a very common occurence with the Roborock e4, as it can have multiple different reasons. In the following guide, I will give you step-to-step instructions on how to fix this error.
Step 1: Diagnosing the source of the error
The most obvious source of the error is the filer in the dust tank of your vacuum. Make sure it is clean and dry. If you have been using your filter for an extended period of time, you might need to swap it out for a new one.
If your filter is clean and dry and you are sure it is not causing the problem, the fix might get a bit more tedious, since we are going to have to disassemble (almost) the whole thing.
Step 2: Disassembly
In order to disassemble (and later reassemble) the vacuum, I can recommend watching henrikcsuri's Teardown Video on YouTube. Follow his instructions until minute 2:40.
Now you should be able to access the motor (the big white circular thing in the back). It should look someting like this:
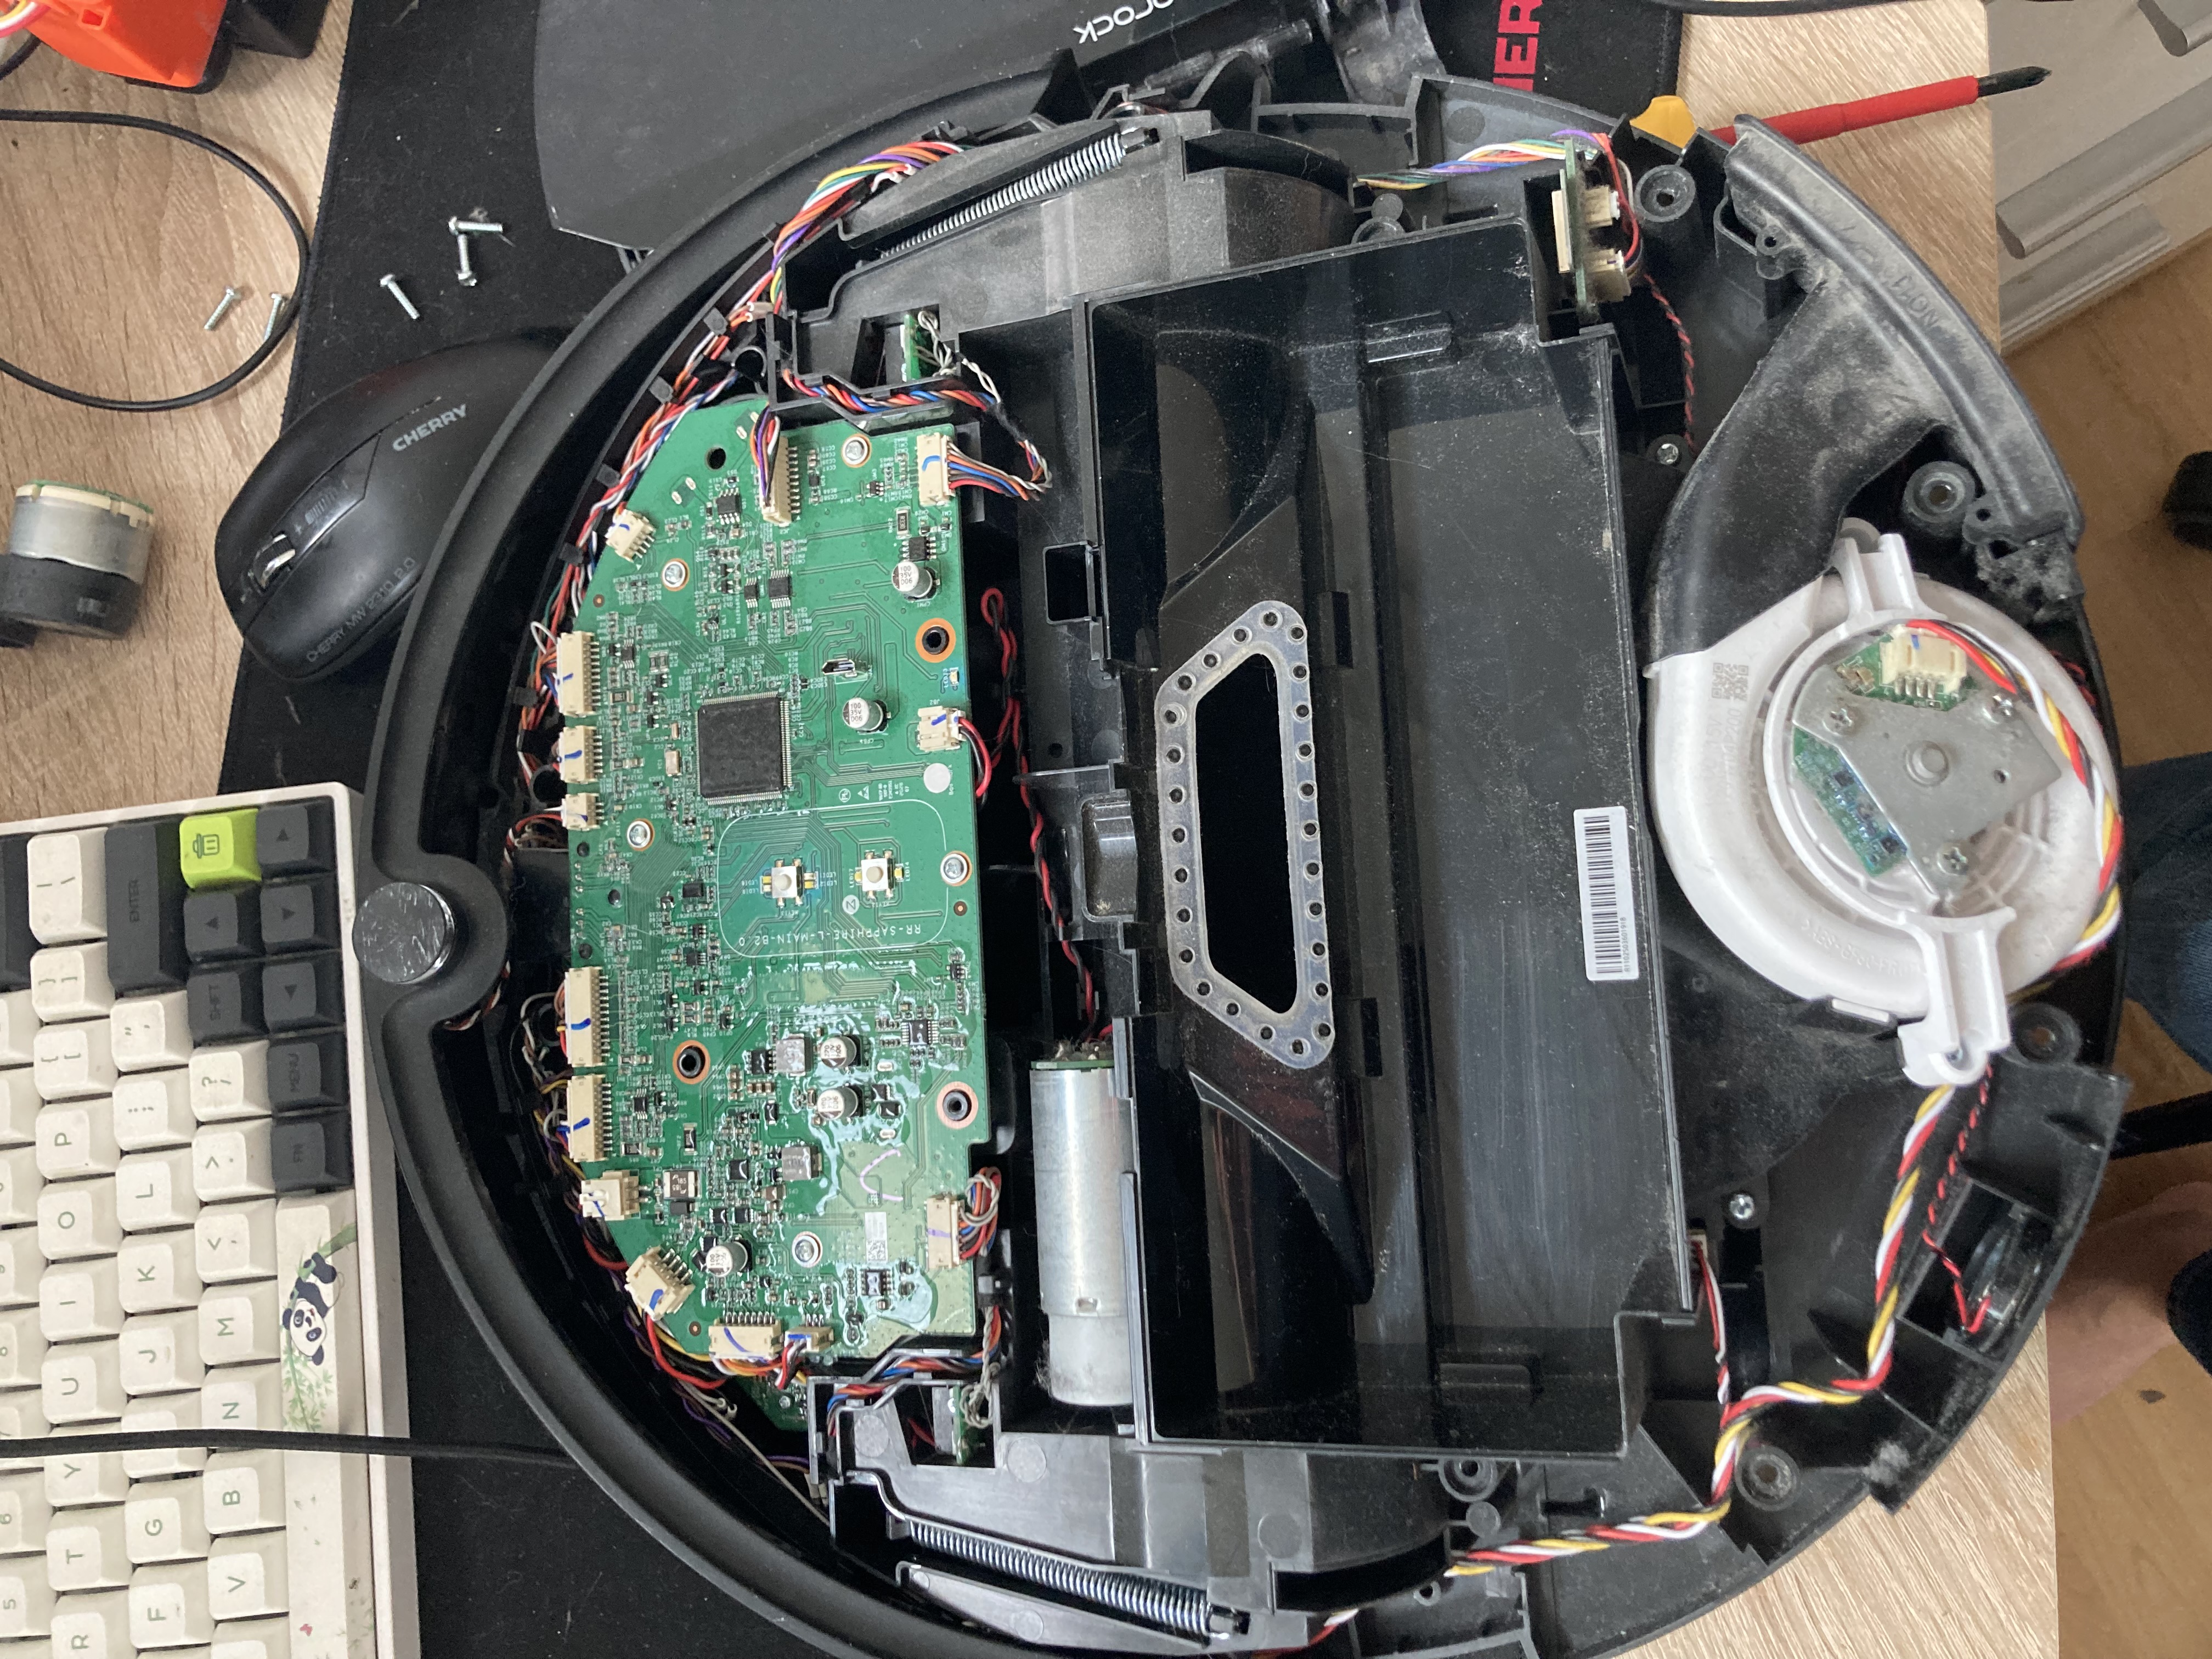
The motor is held in place by a white plastic bracket, which is screwed in on either side of the motor. Remove both of these screws and carefully remove the motor from the vacuum.
Step 3: Cleaning the motor filter
Turn the motor around and you should see the corupus delicti. The inlet of the motor has a small grid, which keeps out all of the dust that passed through the first filter. After some time, this grid will be dirty enough to disrupt the airflow and cause the problem you are having. It might look something like this:
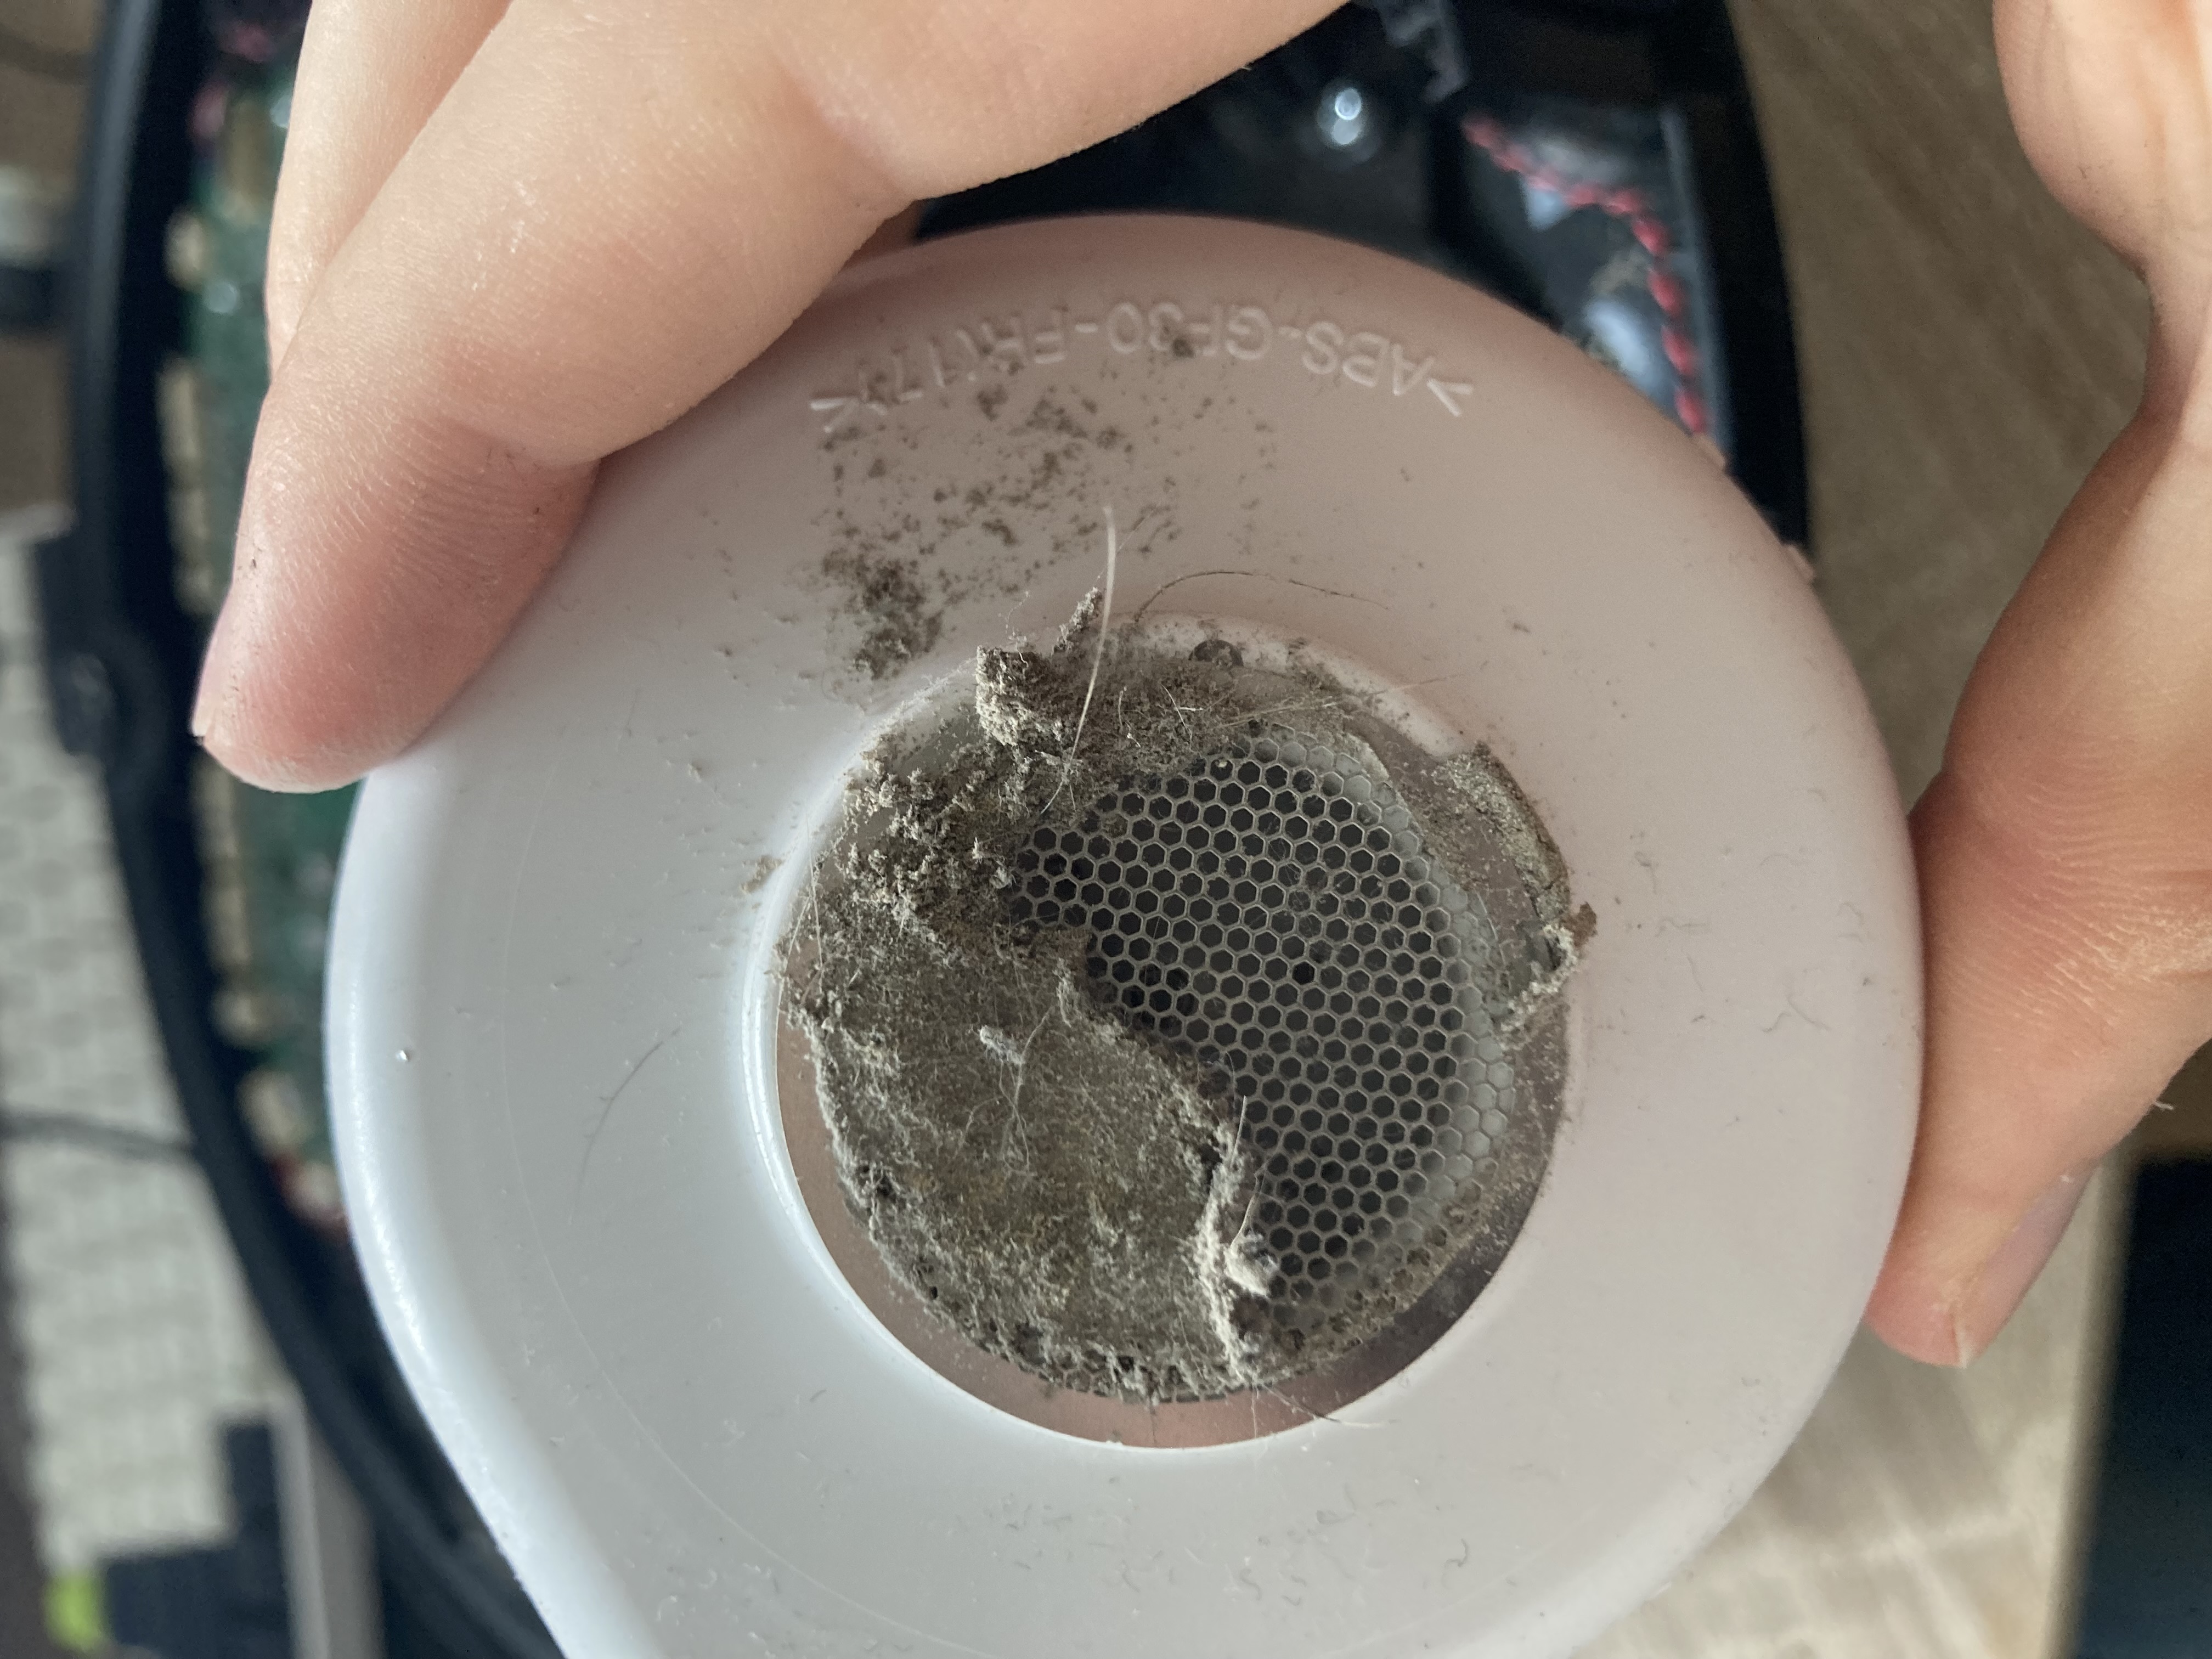
Now just remove as much of the dust as you can. Make sure that no dust falls into the motor, since this can damage it.
While you're at it, you can also check if something blocks the chambers, that you normaly would not be able to access.
Once your filter is clean again, put the motor back in place and make sure, that the exhaust is properly connected to the silicone exhaust tube on the case of the vacuum.
Step 4: Reassembly
In order to reassemble your Vacuum, just do all steps you did to disassemble it in reverse. The disassembly video also helps in this process. Make sure you don't forget to put parts back in and that everything is properly connected.
Step 5: Check if it works
Once you have made sure, that you put all parts back in, you can try if cleaning the filter solved the problem. The vacuum should now clean properly without reducing power.
Congratulations on saving money and doing the environment a favor by reducing waste and production of new things. If you have anything to add or improve on this guide, feel free to let me know about it here: contact@manuelgroebl.com